5 Instagram Filters You Should Be Using In Your Feed
Sometimes small details dramatically impact the overall impression. Instagram marketing also works like that. You can create a perfect profile and execute a neat promotion campaign, but a wrong filter or another part of editing can ruin it all for you.
If you’re not sure how to edit your photos the right way in third-party photo editing apps, or just don’t have time for that, inbuilt Instagram filters are there for you. And surprisingly, sometimes pictures with these filters look way better than photos edited in VSCO or Adobe Lightroom.
In this article, we’ll take a look at the most popular and nice filters that can enhance your pictures to look more natural, chic, or retro. Your followers will notice the difference ‒ applying filters adds more engagement to posts.
Why would you need to use an Instagram filter?
Some will say: “hey, it’s not 2014 anymore, who uses Insta filters, anyway?” and will be completely right: it’s clearly not 2014 today, but Instagram’s built-in filters are still great for editing photos (if you know how to, of course).
Not every brand manager has time to create a brand’s own filter in photo editing apps ‒ creating a promotion campaign is already a time-consuming task. IG filters are already in the app ‒ they allow you to enhance your photo in a few taps.
To make really unique high-quality content, you need pictures and videos in high resolution and a filter applied ‒ it’s that simple.

How to use Instagram filters?
Filters are actually tricky. Not all of them provide your photos with a quality good enough, and not every filter might fit the brand style you’ve outlined in your marketing strategy. When it comes to gaining more attention and increasing the number of customers through creating engaging content for your followers, you need to up your editing game. Though, sometimes users add a tad too many effects on their photographs ‒ this article will help you use filters wisely and effectively.
These tips will ensure your content looks neat:
- Use one filter consistently. Experimenting is great, but once you’ve found a filter that perfectly fits your style, don’t apply other ones to your photos. Consistency is a key to developing your unique brand style.
- Don’t abuse this feature. Your photograph won’t receive many likes if it gets over-saturated or so bright that it will hurt someone’s eyes. Adding saturation is cool to some point, as well as brightness, sharpness and other editing features Instagram has. It’s easy to get carried away ‒ remember that you’re using filters to enhance the photo, not to completely change it.
- Make it look on brand. Filters and the way your visual looks should correspond to your business type. If you’re selling home furniture or accessories, posting absolutely black & white pictures will leave people disappointed. Make sure your style matches your brand’s vibe ‒ this is a good cue to take another look into your marketing strategy.
In conclusion, make your pictures look natural but stylish enough to fit your brand’s aesthetics.

Top popular filters to enhance your pictures
There are many filters on Instagram ‒ some of them are considered classics and are available to use since 2012. It’s easy to get lost! Luckily, there was some research done to determine the most popular filters that business profiles use. We still advise you to rely on your own visual style, though ‒ consider this top as your desktop note.
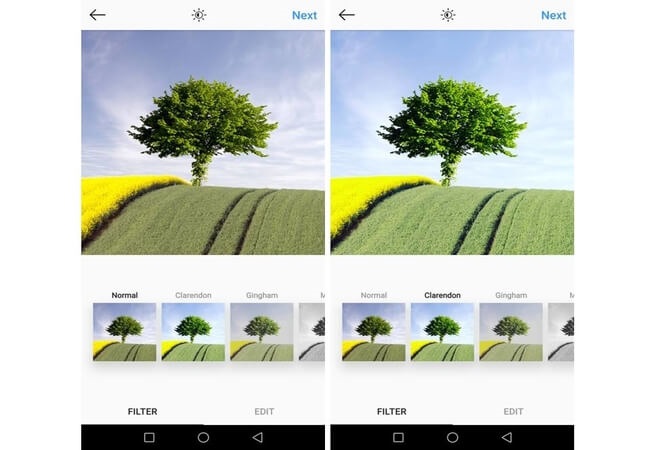
Clanderon adds a nice saturation to make pictures look more natural. You can adjust the vividity to make your content look exactly as saturated as you need it. Clanderon works the best for outdoor and colorful nature shots. Also, this filter is considered to bring the most engagement among others.
Hefe works great to add more warmth and a somewhat nostalgic vibe to your photos. Use it for nature shots, and for pets. This filter is also known for increasing engagement under the posts where it was applied.
Brannan is not as “classic” as the previous two, but still, it gives your pictures a chic look with better brightness. Also, there’s that yellow tint that will make your photo even more unique.

Nashville brightens up your blues and adds a somewhat pinkish shade to the bright parts. It’s a nice and warm look that works great for nostalgic or positive photos. It’s also a nice touch to posts in the fashion niche.
Kelvin is another option loved by fashion brands. It adds a cozy warm look ‒ makes you feel like the picture was taken during the golden hour under the natural light. A nice choice to make posts feel more personal ‒ with this filter, they look like your close friend posted them just for you.
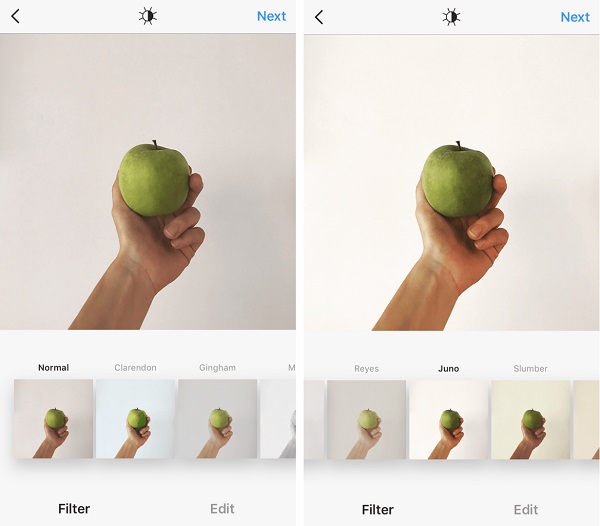
Also, we advise you to try Juno ‒ if you’re a fan of bright photographs where white stays white, this is your top choice. This IG original creation brightens your photos up without adding colorful effects.
Don’t forget to adjust any filter you choose to apply. Ensure it doesn’t change the way your photo is perceived ‒ as we’ve already mentioned in this article, over-editing is a bad choice in any circumstances.
Taylor Brooks
Comments:
Also read:
What Happens When You Mute Someone on Instagram: What happens when you mute a certain follower?
How to Increase Your Instagram Reach With Hashtags: Popular Instagram hashtags
How To See What Someone Likes on Instagram: Can you see someone’s activity on Instagram?
Step-by-Step Guide to Increasing Instagram Followers Without Following Others
What You Need to Know About Getting Verified on Instagram with Less than 500 Followers